Table of Contents:
1. Features
2. Accessories
3. Setting up your tablet
4. Using your tablet
5. Keyboard and stylus
6. Entering BIOS setup program
7. Specifications
8. Troubleshooting
9. Getting help
10. Contacting Dell
11. Locating your Service Tag and Express Service Code
Features of Dell Venue 10 Pro 5056:
1. Power button.
• Press to turn on the tablet if it is
turned off or in sleep state.
• Press to put the tablet in sleep state
if it is turned on.
2. Power and battery-charge status light.
Indicates the power-state of the tablet
3. Right microphone. Provides sound input for audio recording, voice calls, and so on.
4. Left microphone. Provides sound input for audio recording, voice calls, and so on.
5. Front camera. Allows you to video chat, capture photos, and record videos.
6. Headset port. Connect a headphone, a microphone, or a headset (headphone and microphone combo).
7. Volume-control buttons (2). Press to increase or decrease the volume.
8. Micro-HDMI port. Connect a TV, monitor, or another HDMI-in enabled device. Provides video and audio output.
9. USB 3.0 port. Connect peripherals such as storage devices, printers, and so on. Provides data transfer speeds up to 5 Gbps.
10. USB 3.0 and power-adapter port (USB-C). Connect a power adapter to provide power to your tablet and charge the battery. Connect peripherals that
support USB-C. Provides data transfer speeds up to 5 Gbps.
11. Rear camera. Allows you to video chat, capture photos, and record videos.
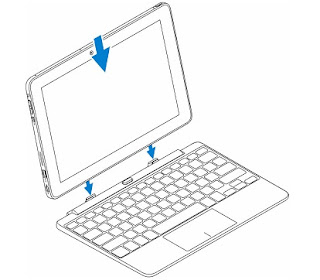
12. Keyboard docking slots (2). Allows docking to the keyboard dock.
13. Service Tag label. Provides the Service Tag and Express Service Code needed when contacting Dell.
14. Docking pins. Allows docking to the keyboard dock.
15. NFC-sensor area (optional). Allows NFC-enabled devices to communicate with your tablet.
16. Noble security cable slot. Connect a Noble security cable to prevent unauthorized movement of your tablet.
17. Micro-SIM card slot Insert a micro-SIM card to connect to a mobile broadband network.
18. microSD card slot. Insert a microSD card to expand the tablet’s storage capacity. Your tablet supports a microSD card with capacity up to 128 GB.
19. Windows button.
• Press to display the Windows Start menu or Start screen.
• Press for quick access to the most recently used app or most recently viewed screen.
20. Camera-status light. Turns on when the camera is in use.
Thank you for visit my blog.
For complete ASUS N551ZU Notebook User's Manual PDF File, please click link below :
Dell Venue 10 Pro 5056 User’s Guide Windows 8.pdf
Dell Venue 10 Pro 5056 User’s Guide Windows 10.pdf
Dell Venue 10 Pro 5056 User’s Guide Windows 10.pdf


Tidak ada komentar:
Posting Komentar